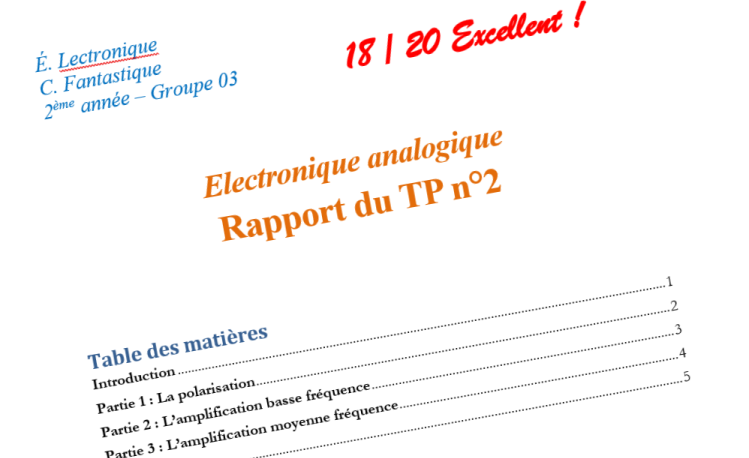
En synthèse
Demandez-vous : quelles informations je souhaiterais avoir si j’avais à reprendre ce travail en contexte stressant ?
3 grandes parties classiques : l’introduction (qui précise le contexte et l’objet du rapport) ; le développement (qui reprend les grandes étapes et commente les résultats) ; la conclusion (qui synthétise le travail et prend du recul).
What to write in your report?
Imagine: you’re working in a firm, and your boss calls you to work in a quality crisis cell. The work was done years ago by a person who is no longer in your company, so you have to learn what’s been done just by reading the reports.
Or imagine: you’re back from holidays to school and a friend of yours asks you about the exam to come… What exam? You completely forgot about it! You then take your report.
What would you like to find in it? Just the same as what your teacher would like to find in your reports 😉!
Introduction: What is it all about?
The introduction should contain at least 3 parts:
- The context: In which situation are you doing this report (which course, which part, etc.)?
- Usefulness: Why are you writing this report (well, because you were asked to, but there should be a reason why you were asked 😉)? What’s the goal, what should you learn, what’s the point, what’s the usefulness?
- The plan: What are the significant parts of your report? These parts should show a path and a logical progression.
If you were reading while in a cell crisis, you would like to see here: what will I learn? At which stage, in the project, was this written? Is it useful for my problem?
The main part: what you’ve done, what you’ve understood, what you think
The main part should make explicit the evolution in your thinking/understanding. This is as a LEGO assembly, where each part has its usefulness and adds a little to the previous stage.
You need to be clear, explicit and highlight the most important parts. Show the information so that the test can be done once again using just your indications (initial conditions, settings, protocol,…). And, most importantly, add your own commentaries to the results: this is your real added value, this is awaited from you! At last, write the problems you faced, and the solutions you (hopefully) found.
If you add illustrations (which you probably will), remember to always add a title, legends, scales and units to each axis. Remember, it is a general good practice to report your measurements in a graph (adjusted quantity on the x-axis and the measured quantity on the y-axis).
If you were reading while in a cell crisis, you would like to see here: what has been made? What are the results and related comments? What problems were met and what solutions were given?
Conclusion: take a step back
The conclusion is the report’s synthesis: first, remind the work you’ve done, the fundamental lessons you got. The key is to give only the most important things, without forgetting one (ask yourself: if I had just 30 seconds to remind myself of this work before doing it for a test, what should I remind?).
Next, write the limits of the practical work you’ve done. This can be oversimplification, component’s or measurement tools’ tolerance, the hypothesis or anything else that one should have in mind at the end.
At last, tell what could be the next step / open your work to a wider perspective.
If you were reading while in a cell crisis, you would like to see here: what main should we remind from that? Is it enough or should the work be completed by something else?
Last but not least: check your grammar!
If your report is excellent but has spelling mistakes on each sentence, you make your reader’s work painful… Check your grammar, check your spelling, you will give your report a much higher value!
Today, there are very good (free) checkers available: Word, LanguageTool, ProWritingAid (or Mistral and ChatGPT) among others. Use them!
Annex: Equations
If you write your report under Word or Google Docs, you may need to insert equations. Here are the important things to know about it.
Word
How to Use
- Insert an Equation: Press
Alt+=or go toInsert>Equation. - Choose Input Mode: By default, Word uses UnicodeMath, but you can set the equation box to accept LaTeX commands (how to change).
- Type the command, then press Space (or Enter) to convert.
Essential Working Commands
| Command | What it does | Example |
|---|---|---|
^ | Superscript | x^2 → x² |
_ | Subscript | H_2O → H₂O |
\sqrt{x} | Square root | \sqrt{x} → √x |
\sum | Summation symbol | \sum → ∑ |
\int | Integral symbol | \int → ∫ |
\infty | Infinity | \infty → ∞ |
\leq | Less or equal | \leq → ≤ |
\geq | Greater or equal | \geq → ≥ |
\approx | Approximately equal | \approx → ≈ |
Greek: \alpha, \beta | Greek letters | \alpha → α, \Beta → β |
Arrows: \rightarrow, etc. | Arrow symbols | \rightarrow → → |
All commands must be typed inside the equation editor box for them to work.
Special Features & Tips
- Math AutoCorrect: Type e.g.
\pm+ Space for ±,\neqfor ≠, etc. - Enable Math AutoCorrect in Text: In Word Options > Proofing > AutoCorrect > Math AutoCorrect, check “Use Math AutoCorrect rules outside of math regions” to use shortcuts in normal text.
- Professional Formatting: For 2D “display” style, use the “Professional” format in the equation tab.
- Switch to LaTeX Mode: In Equation tab, set input style to “LaTeX” for full LaTeX compatibility in equations.
Student Tips
- Stick to basics: ^, _, \sqrt are the most useful.
- Use Math AutoCorrect for fast symbol typing (just prefix with a backslash, e.g.
\alpha). - Learn the distinction: UnicodeMath for basic commands, or invoke LaTeX input for LaTeX-style.
Google Docs
- Click Insert > Symbol > Equation
- Type the shortcut in the equation box
- Press spacebar to convert
Essential Working Commands
| Command | What it does | Example |
|---|---|---|
^ | Superscript | x^2 → x² |
_ | Subscript | H_2O → H₂O |
\frac | Fraction | \frac{a}{b} → a/b |
\alpha | Greek alpha | \alpha → α |
\beta | Greek beta | \beta → β |
\sqrt | Square root | \sqrt{x} → √x |
\sum | Summation | \sum → Σ |
Mathematical Operators
\times→ ×\div→ ÷\pm→ ±\cdot→ ·\infty→ ∞
Relations
\leq→ ≤\geq→ ≥\approx→ ≈\ne→ ≠\equiv→ ≡
Arrows
\rightarrow→ →\leftarrow→ ←\leftrightarrow→ ↔
Functions (render in upright font)
\sin,\cos,\tan,\log,\ln,\exp
Student Tips
- Master the basics first:
^,_,\frac,\sqrt - Use Greek letters for variables:
\alpha,\beta,\theta - For chemistry: Use subscripts for formulas (
H_2SO_4) - For physics: Use superscripts for powers (
E=mc^2) - For complex equations, consider external tools like Auto-LaTeX Equations add-on
La carte mentale
Lien vers la carte mentale : https://app.wisemapping.com/c/maps/1377739/public
En savoir plus sur L'Electronique, C'est Fantastique !
Subscribe to get the latest posts sent to your email.